- +27 12 644 0300
- +44 1234 834920
- This email address is being protected from spambots. You need JavaScript enabled to view it.
Articles
How Do I Create and Change AEC Materials


Applies To:
Caddie 16 with Vio
Question
How do I create and change AEC materials used with Vio rendering?
Answer
The best way to render in caddie is to use the, add-on, Vio rendering commands.The description below requires the Vio rendering commands. Assigning renders to standard 3D objects can be done by using the materials tools in the Vio commands. Normally a material would be created and then the material attached to a 3D object by selection, layer, etc. When it comes to AEC objects a different approach has to be taken..
How To Change "db" Materials
All AEC objects are created using styles. If we look at a wall for instance, the wall style may consist of a number of wall components, Brick, Cavity, Insulation, Block and Plaster etc. Each of these components will have been assigned a render when the style was created. To give the user a head start, the standard wall styles already have a render assigned. It is likely that the style will just be a flat colour as a representation, but never the less a quick render could be produced.
All of the currently assigned AEC renders will show in the Materials dialogue once they have been loaded. There are basically two ways these can be loaded.
- The first time the render command is used with AEC object present in the drawing
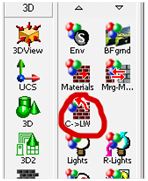
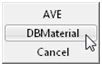
- Using the Convert Materials Command and selecting DBMaterials from the dropdown
|
Once loaded by either of these methods, the materials dialogue will display the AEC materials as shown. |
|
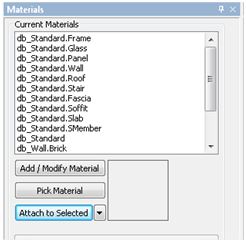
As already mentioned, the normal Pick Material and Attach to Selected buttons are not used with AEC objects. It is the style of the object that assigns the material.
How do we know what materials are used for a particular AEC object.
This can be done by either using the AEC Style manager from the AEC menu or easier is to select the object and from Object Properties select the material option.
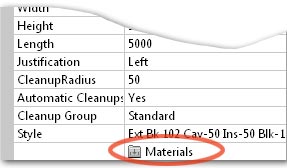
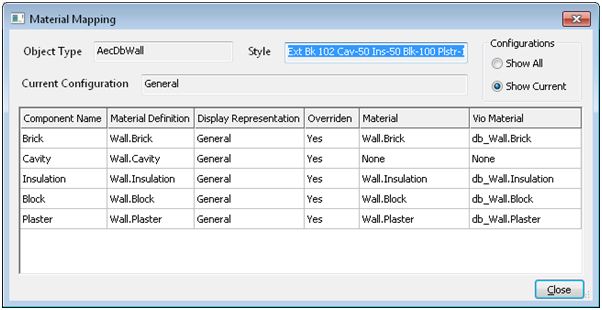
We can’t change the materials here; this dialogue is just used to identify which of the numerous materials is used for a particular component.
Once we know the material we can change it. The easiest material to apply is an image material. This will normally be an .JPG image and can be sourced either from materials supplied with Caddie, your own images or from one of the various internet sites. We will look to change to a pre-defined materials see later in this article.
To change the material for the brick component in the above example, select the db_Wall.brick material from the materials dialogue.
|
|
|
You will notice the current base colour and a reflective colour render for this component has already been pre-set |
|

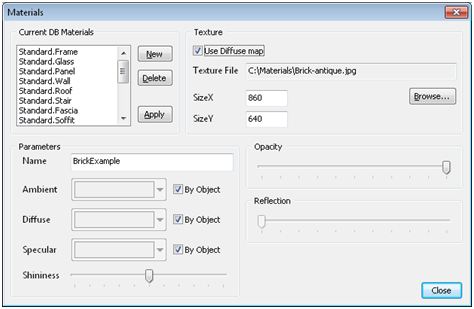
- Tick the Update Texture File tick box
- Browse to the image you want to use
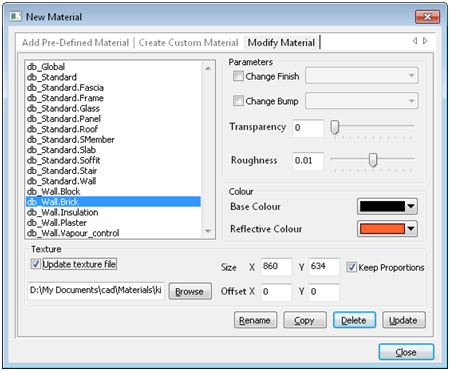
- You will notice the Path and file details have now been entered
- Change the size. By default the size is the actual pixels of the image. However a good rule of thumb is to work out the physical size in millimetres and convert this to pixels. For instance if the image shows 4 bricks wide this would equate to 860mm so enter 860 in the x value. If the Keep Proportions tick box is set, the Y direction will be automatically calibrated
- The Transparency and Roughness can be changed if required
- Select the Update button. The base colour will change, however we are not using it, so it can be ignored
- If you need to, change any other materials by selecting the material and change as above
Now when a render is performed the final rendered image will show the brick in the chosen texture.
Note that all wall styles using this changed “db” material will also be changed. If you require a different texture for some walls, a new style will have to be created and a new material assigned to the component in the AEC Style Manager.
How do I change the material to an internal texture?
Vio has a number of pre-defined materials libraries available. These are accessed from the first tab in the materials dialogue. to modify an existing Pre-Defined material a different method has to be used.
- Select the "Add Pre-Defined Material" tab
- Choose the required material
- Tick the tick box "Change Name"
- Select the " ADD" button

- From the Material name drop down select the name of the material that you want to change
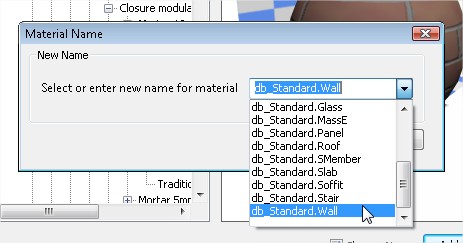
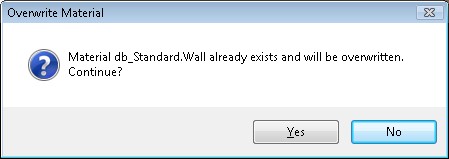
- Select "OK"
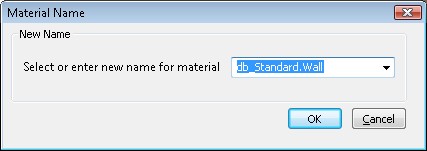
- Say "YES" to the Overwrite Material dialogue
- If you don't need to change any other materials, select "Close" from the initial dialogue.
Basically what you have done is to create a replacement material called db_Standard.Wall
Creating An AEC Material
|
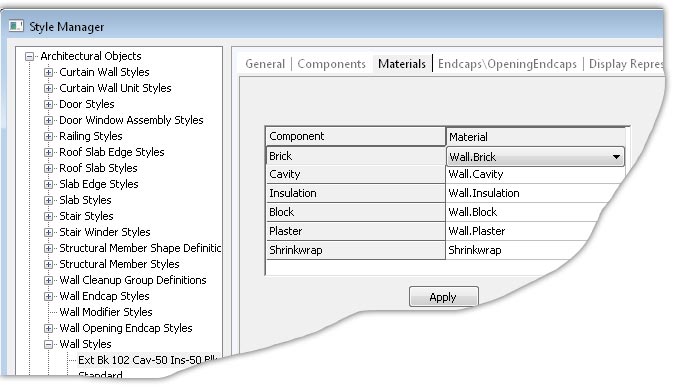
As mentioned AEC objects are defined by their styles. Part of the process in creating a wall is to assign a material to the styles components. With the wall style selected choose the Materials tab. Against each component there is a materials drop down. From this you can select any named material.
|
|
|
If you need to create a new material move down the left menu and expand Multi Purpose Objects and select Material Definitions. Here you will see NEW at the bottom of the list. The name of this material will default to MaterialDefinition_n, where n is an incremental number. The name can be changed by selecting the General tab.
|
|
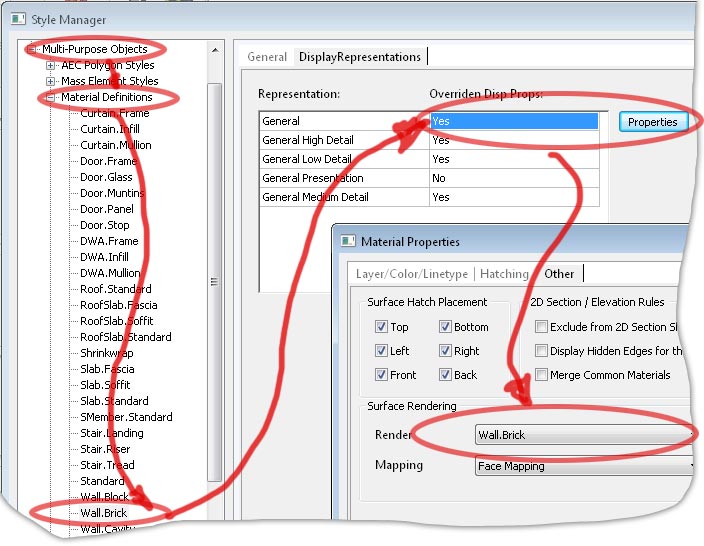
From the Display Reprsentions tab, if there is a NO in the field double click it to change it to YES then, select the Properties button.
In the subsequent dialogue give a name to the material and select the the parameters, such as Diffuse Map (the texture image) or just select an Ambient colour and set any of the other properties. These can of course be change later as has already discussed.
Select Close, Apply in the previous dialogue and close the AEC Style Manager. To see the material in the materials dialogue refresh the list by using the C>LW command as mentioned above.