All objects in Caddie have at least one grip point. Grip points will do a variety functions and the actual function will not only depend on the object type selected but also the actual grip point selected. By default grip points are set to display. However they will only be displayed if the number of grip points to be displayed is less than the preset limit set in Environmental Settings (see below).
There usually is one grip point at all the controlling points of the object plus one on at the origin point of the object (hatch, opaque and viewports etc.). Some object such as Block References and Text only have the one grip point. These can be picked by selection and moved in by placing or specifying. When picked the origin of the grip will be used regardless of the distance from the grip the selection was actually made.
Lines have three grip points, the ends change the position of the line end and the centre changes to position of the line.
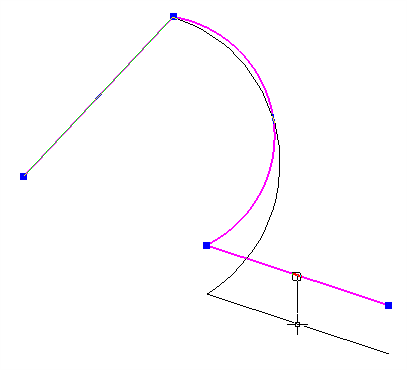
Polylines have grip points at all the nodes. Curved segments have a centre grip point that allows the changing of the arc size. Straight segments have centre points that allow the repositioning of the segment and adjoining segments nodes
Looking at the selected line in the above picture you will notice the selected line has three blue squares showing. Picking up the centre point by clicking the mouse left button down on it allows you to move the whole line as drawn to a new position (use the right click snaps for accuracy). Left clicking the end points allows you to change the positions of these points and effect changing the shape of the object.
.png)
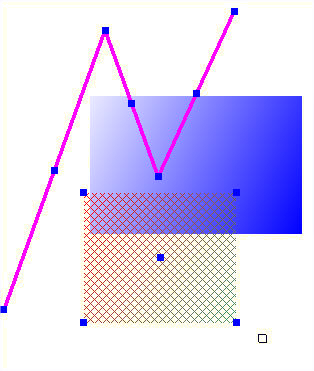
With more complex object such as hatch, images etc. you can re-shape them by picking any of the objects grip points or move the object using the central grip point. Use of the grip points can also elevate the need to use the context menu.
For instance moving text is easy.
.png)
Just select the text with one click and then select the grip point and now you can move the text to a new position.
The standard grip points (default dark blue and square) are change by these settings. To change AEC grip points see Changing AEC Selection Points
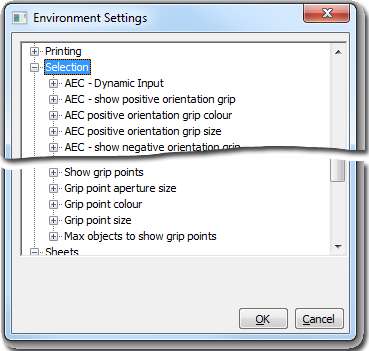
By default "Grip Points" are turned on so if you need to turn them off go to Configure on the menu bar and select Environmental Settings. Here you will find a section called "Selection" which has a sub section called "Show Grip Points" Expand it and double click YES to bring up the Yes / No selection box and choose "No".
This sets the distance from the nearest object where selections can be made. The default is 30 pixels. This will also effect the distances where parallel lines and construction lines are made
Changes the colour of the grip points
The default is 30 pixels. It is not normal to change this size. This only effects the Blue Square grip points for standard Caddie objects. AEC objects are handled separately.
The number of selected objects that will show grip points. The default is 20. If more then the preset number of objects is selected, no grip points will show. If this number is made too large it can affect speeds when selecting a large amount of objects.
See Also
Standard
Selection Dialogue
Translate