Right clicking with the mouse (or Graphic pen equivalent) produces the context menu. The idea of this menu is to improve the speed of editing a drawing by providing the main editing tools as required. The term context means that depending on what you are doing will depend what options you are presented with.
If nothing is selected or no command is active you will see the basic menu (see below).
|
It is worth noting at this point that to de-select
an active command or un-select an object you can either right
click and use Option-End or press Escape (ESC) on the key board.
A Re-Gen (R) will also clear any selection but bear in mind with
a very large drawing this could take a little time. A Re-Draw
will also clear the selection and is quicker. |
When you right click the mouse (or equivalent on the pen) the left of the two window panes will show. Everything above the dividing line will appear whatever you are doing. Below the dividing line various options will be presented depending on what has been selected.
From this menu you can:
This works in the same way as the standard DISPLAY ZmBox command.
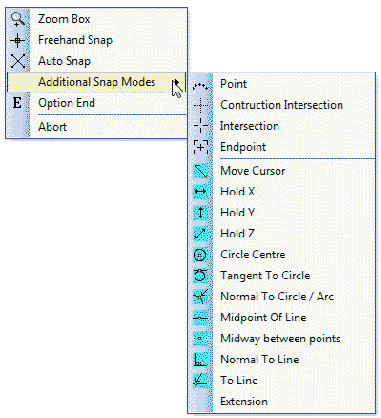
There are three snap options Freehand, Auto-Snap and additional Snaps.
The no snap is selected.
You may need to set up Auto-Snap before you use it, to select which snaps are used to suit the way you work.
If selected, presents you with an additional snap menu of the more commonly used snaps. If further snaps are required then use the Snap menu or create a custom snap menu.
Use this command to complete or end the current command. Escape on the keyboard will also end the command, but note that if a command completion is require only use the Option-End command and not escape. Apart for terminating or completing a command Option-End will also, in most cases, remove any selections.
For the Context settings (below the divider) there are three basic choices:
This allows controlled selection of the drawing. See Object Selection for more details.
Used for interrogation and control of the selected object properties. See Object Properties for more details.
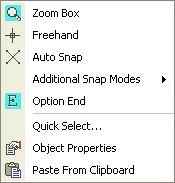
Pastes the contents of the Caddie Clipboard previously obtained by using the Cut to Clipboard or Copy to Clipboard commands from the context menu or the Cut Marked or Copy Marked command from the Edit menu.
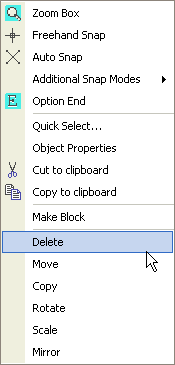
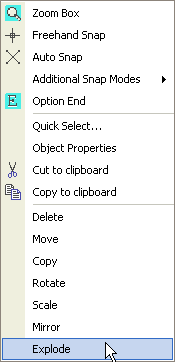
If an object or a group of objects is selected prior to doing a right click then extra options will be presented.
|
|
|
|
These include:
Selecting delete will delete all the selected objects. There is no second chance dialogue but an undo will restore the previous state however a Re-Gen (R) may need to be preformed. A quicker way to delete selected objects is to use the delete key on the keyboard.
Moves the selected objects from the first indicated point to the second indicated point. This command is similar to Trans | Trans (Move) but works with selections. The &Trans commands can also be used &Rotate, &Mirror & &Scale which can be found on the Edit Menu bar and the main top tool bar.
Same as Move but leaves the original objects as they were. This command is similar to Trans | Trans (Move) but works with selections. The &Trans commands can also be used &Rotate, &Mirror & &Scale which can be found on the Edit Menu bar and the main top tool bar.
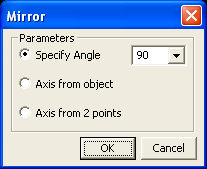
Similar to the Trans | Mirror command but works with selections. The &Trans commands can also be used &Rotate, &Mirror & &Scale which can be found on the Edit Menu bar and the main top tool bar.
Rotate the selected object(s) around a specified point similar to Trans | Rotate but works with selections &Trans commands can also be used &Rotate, &Mirror & &Scale which can be found on the Edit Menu bar and the main top tool bar.
Scales the selection around the specified point similar to Trans | Scale but works with selections. This command uses the Command line for entry. Setting the angle to "0" allows a dynamic rotate to be preformed. The &Trans commands can also be used &Rotate, &Mirror & &Scale which can be found on the Edit Menu bar and the main top tool bar.
If more than one object is selected then the Make Block command is made available on the context menu. This command works in the same way as the Advanced Objects | Make Block command only the selection process has already been done so is not shown in the dialogue box.
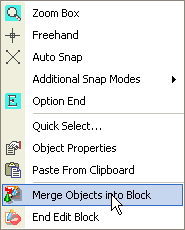
If a block is currently being edited then the End Edit Block command is presented. This is the same as the on in the Advanced Objects | End Edit
If a block is currently being edited the Merge Object into Block command is presented. If selected you will be then asked to indicate an object to merge. This is the same command as Merge Object Into A Block found in the Advanced Objects group of commands.
If a single object is selected and it is either a block, 2D polyline, 3D polyline, hatch, text, dimension or any object that can normally be exploded then the explode option is presented.
If one or more objects are selected then the copy to clipboard command is made available. If selected the selected objects are copied to the Caddie clipboard for pasting to another sheet or the model space or to another drawing. You will be asked for the origin but if not given the origin will default to the drawing origin (0,0,0) or the sheet origin (0,0,0)
See Also
All transformation and manipulation commands.
Make A Block