Creating a Variable Custom Pen Thickness

We are always being asked how to create a ‘Boundary’ or ‘Special’ pen.
One way would be to pre-assign a number of pens in the plot style file, specifically for this purpose.
It is quite common to have, say the first 8 or 9 pens, set to progressively thicker lines, with a custom pen colour of, say ‘Black’, There may also be a second set of pen (say 11 to 18) with the units are that same for each thickness as 1-9), but all with a colour of,say, ‘Mid Grey’. These can then be used for any secondary detail such as line hatches, or existing or other building detail.

First 5 Pens
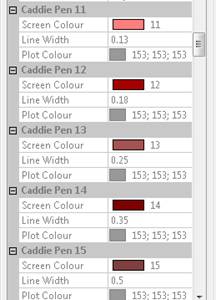
A Set of Grey Pens
If you want sets of extra colours such as red, green an blue, for boundary lines etc., you soon start to eat into the remaining 255 pens. This reduces the number of pens that can be set as ‘Object Colour’, which you may want to use for hatch etc. Not only that, you will have a lot more pen numbers to remember.
A way around this, for these ‘little used pens’, is to have three pens (80, 160 & 240 as an example) set in the plot style. These are set with a custom colour of GREEN, BLUE and RED respectfully and thickness set to ‘OBJECT’
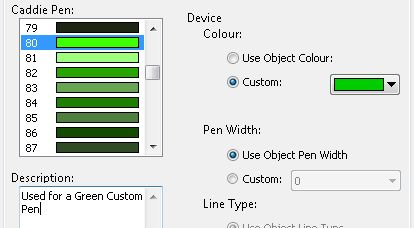
Settings for a Green Custom Pen
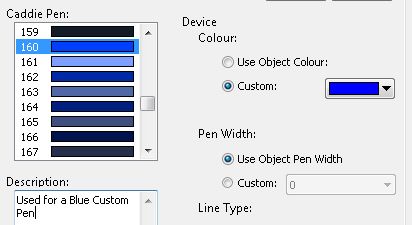
Settings for a BlueCustom Pen
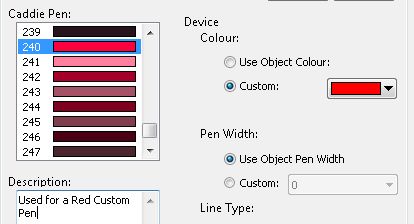
Settings for a Red Custom Pen
As a note, the maximum pen thickness that can be set is 2.11mm. There are a number of solutions to creating thicker lines.
- The first is, simply, to draw parallel lines with an offset of just under the current thickness. This howe ver makes editing any changes more complicated but this can be done with lines, arcs and polylines etc.
- A better solution is to draw with polylines. Polylines can have an additional properties, one of which is ‘Constant Width’. To change this width, select the polyline. Using ‘object properties’ change the width to the required thickness
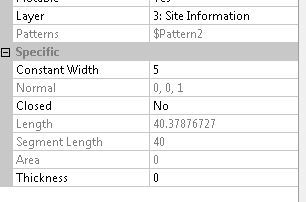 .
.- To change the width of an individual segments, start and end width, use the ‘CADDIE | MODIFY | MODPOL’ command.
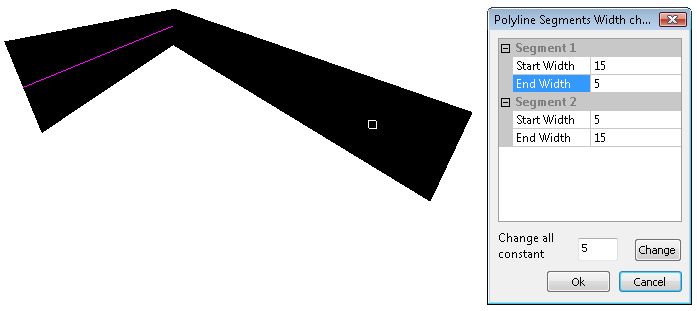
Selecting 'CHANGE' will change all segments to a constant, specified width, which is the same as using object properties.
Another polyline property that can be set in ‘Object Properties’ is ‘Thickness’ and this gives a thickness in the Z axis. This is not, normally, used for 2D drawing.
NOTE: When editing a polyline using the 'CADDIE | MODIFY | POLYLINE' commands, such as 'Insert Node', any existing thickness will revert to '0'