Polar snaps allows quick snapping when entering or moving objects.
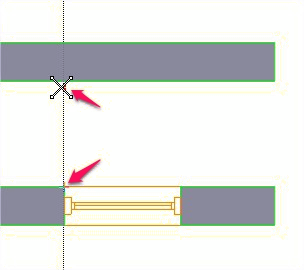
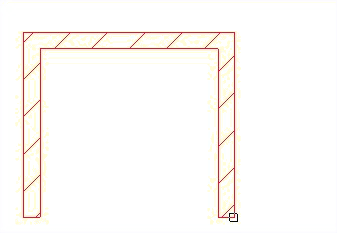
In the first example an AEC wall is being moved from position 1 to 3. Position 3 is in the same axis a position 2. So when coping the wall, first set your snap mode to the required snap. In this case it was set to Autosnap. The initial place (1) was selected. Now the great thing here is by moving the cursor close to point 2 (without clicking), the nearest snap point is picked up as a reference. Now you will see a vertical (moving in the y axis) or horizontal (moving in the x axis) dotted line which represents the 90 degree angle already setup (see further down how to set this angle).
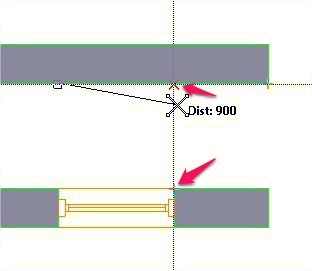
Moving along the polar line in the required direction, now keeps the current position in the chosen axis. A number of things can be done at this point. We could just move to a required position and click. This would use the current position or the nearest snap. The final point used (3 in this case) will be on a horizontal polar position and therefore either be in the X-axis from point two. A value could be entered followed by the enter key. This would place the wall
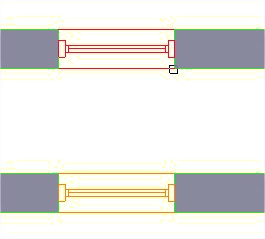
Here is another example. Here we want to insert another window in a different wall. Using the indicate option of the AEC window command with a Quicksnap option set hovering over the first corner of the existing window moving the cursor will pick this point a polar snap on the X-axis. Now clicking near the second wall a point is vertically picked up as the start of the window. To get the second point hover over the right end of the existing window, dragging upwards to start another vertical polar line. Selecting near the second wall will indicate the end point of the new window.
|
|
|
Selecting the first point |
Selecting the second point |
Result |
|
|
|
|
|
|
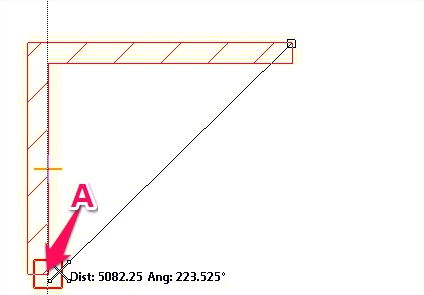
With Polar Snap on Start and move upwards. Type the required value (in this case 3500) and press enter. This has now drawn a wall 3500 in the X-axis. |
For the second point move the cursor to the right and enter a new value (4000) followed my an enter. This will draw the second wall. |
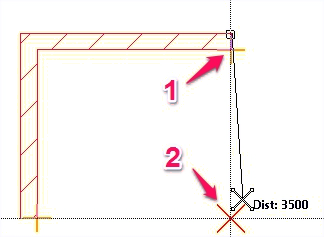
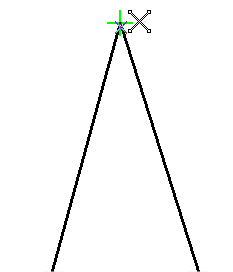
For the third wall hover over point A |
 |
 |
|
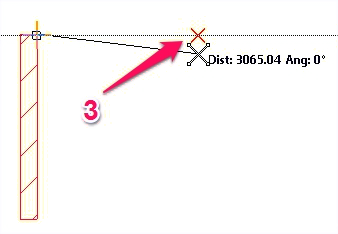
Moving the cursor to the right a x-axis polar line will be displayed. As the cursor is moved perpendicular from point 1 a effective intersection is displayed. Clicking the mouse will use this point. |
The result |
The last example, shown above, demonstrates the use of multiple extension points. The default is up to 5 points (see the settings below to change this).
This command can also be used in combination with the Snap - Extension command found on the CSM.
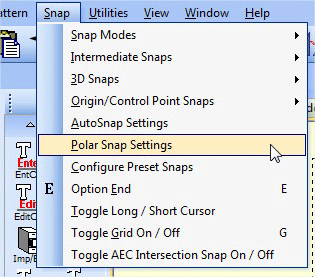
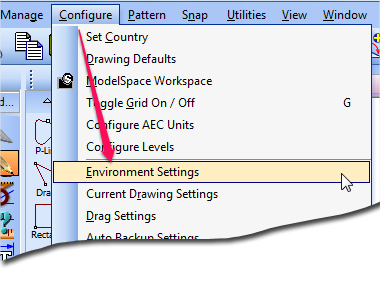
Access the setting from the MENU
. 
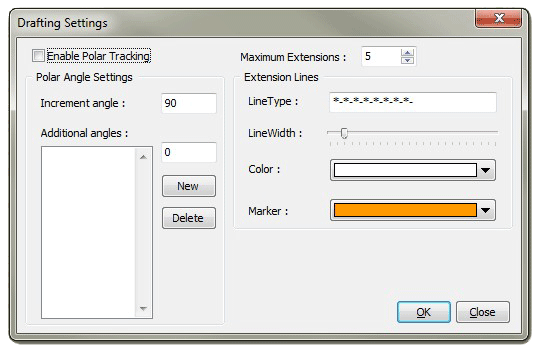
With this box tick, polar tracking is enabled. See below for quick access to enabling and disabling the polar snap.
This is the base angle (default is 90)
Additional one-off angles can be added
Type the value and select ADD. To delete a value select the value and click DELETE.
Note
The angles are actual angles. For instance if 45 degrees is added, only the angle of 45 will be shown from the selected snap point. Other angles such as 135, 225 & 315 will not be used. In order to use any of these angles, add them individually to the additional angles list. If it is required to have all the angles of 45 degree increments then change the master angle to 45
This is the maximum number of points used to determine the final intersecting position. The default is 5.
Sets the parameters for the display of the polar lines.
The display of the line can be altered by editing this field with a combination of hyphens and stars
Sets the display width of the polar line
Sets the colour of the polar line
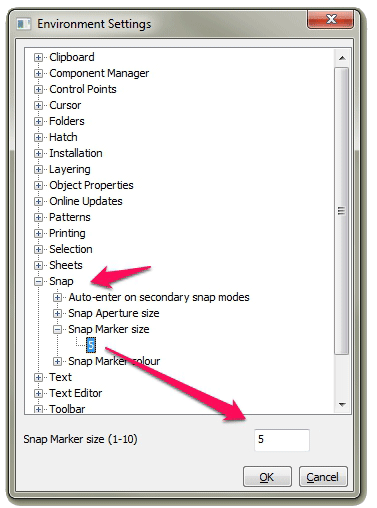
Sets the colour of the marker.
Changing the normal snap marker will also change the polar snap marker size
To change the marker size use environment settings from MENU-->SETTINGS.
 .
. 
Polar tracking can be enabled or disabled whilst drawing.
Using the toggle switch available on the bottom status bar. Just click it to switch the status.
OFF |
ON |
|
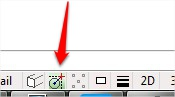 |
Not all situations will suit using a polar snap, so using this toggle, allows changing the setting "mid-flow".
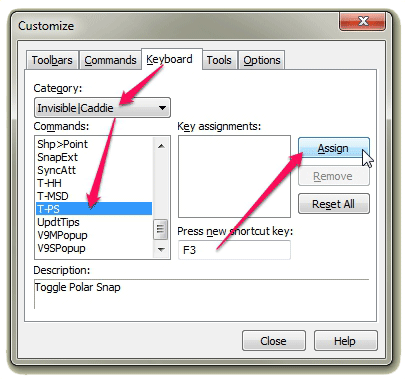
If you require a keyboard shortcut, right click on the top tool bar and navigate as shown below. Key "F3" is shown here as an example, but you can use any available key combination. See Keyboard Shortcuts - Customising for more information regarding keyboard shortcuts.
For further details watch the videos from the Caddie website , and
, and